Makita 4190D User Manual
Browse online or download User Manual for Power tools Makita 4190D. Makita 4190D User's Manual
- Page / 20
- Table of contents
- BOOKMARKS
- Cordless Cutter 1
- SPECIFICATIONS 2
- GENERAL SAFETY RULES 2
- SAVE THESE INSTRUCTIONS 2
- Electrical Safety 3
- Personal Safety 3
- Tool Use and Care 3
- SPECIFIC SAFETY RULES 4
- BATTERY CARTRIDGE 7
- FUNCTIONAL 8
- DESCRIPTION 8
- Adjusting the depth of cut 9
- ASSEMBLY 10
- Hex wrench storage 11
- Installing water supply 12
- OPERATION 13
- MAINTENANCE 14
- ACCESSORIES 14
- La Mirada, CA 90638-5753 17
- Makita U.S.A., Inc 17
- 14930 Northam Street 17
- MAIL THIS PORTION 18
- FACTORY SERVICE CENTERS 19
- Makita Corporation of America 20
Summary of Contents
INSTRUCTION MANUALWARNING:For your personal safety, READ and UNDERSTAND before using.SAVE THESE INSTRUCTIONS FOR FUTURE REFERENCE.www.makitatools.comC
10Bevel cuttingLoosen the bolt (A) on the depth guide and the bolt (B) onthe bevel scale plate with the hex wrench. Set for the desiredangle (0° - 45°
11Installing or removing diamond wheelTo install the wheel, first loosen the bolt with the hex wrenchand remove the bolt and the flange. Then mount th
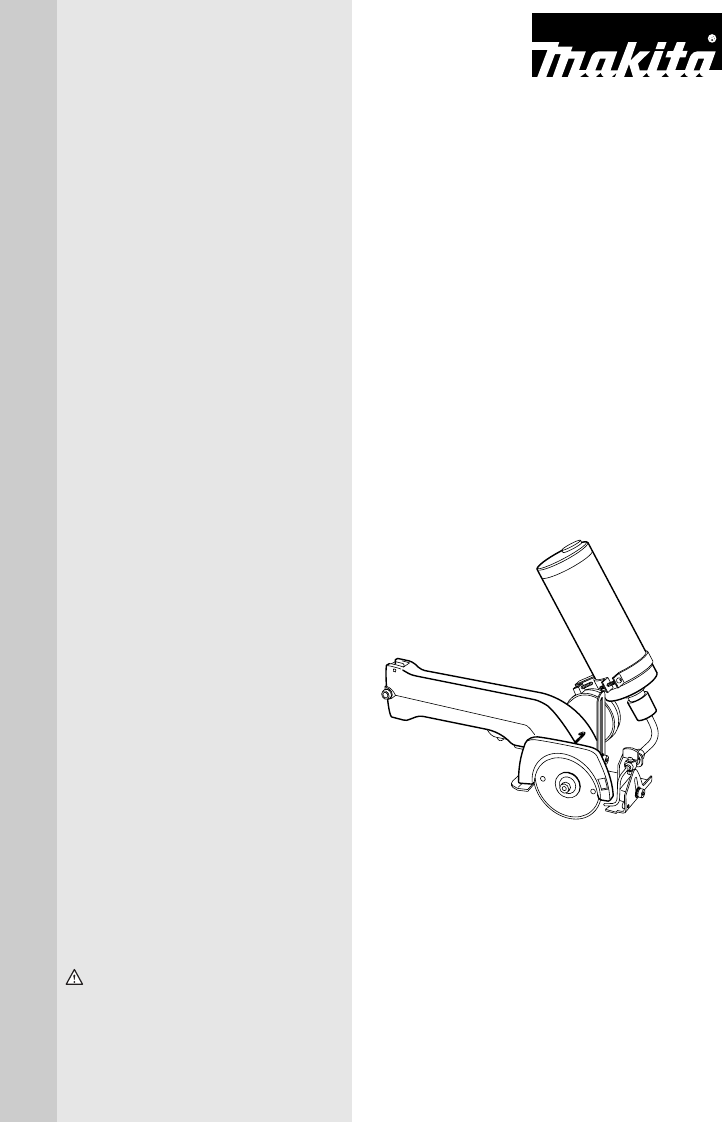
12Installing water supplyAttach the tank holder on the tank. The tank holder should beattached around the portion shown with the dotted line.Tighten t
13OPERATIONHold the tool firmly. Set the base plate on the workpiece tobe cut without the wheel making any contact. Then turn thetool on and wait unti
14MAINTENANCECAUTION:• Always be sure that the tool is switched off and thebattery cartridge is removed before attempting toperform inspection or main
Memo15
Memo16
17First-ClassPostageRequiredPost Office willnot deliverwithout properpostage.Makita U.S.A., Inc.14930 Northam StreetLa Mirada, CA 90638-5753FoldCut
181. This product was purchased from:Home CenterHardware/Lumber StoreTool DistributorIndustrial SupplyConstruction SupplyOther ( )
19FACTORY SERVICE CENTERS1-800-4-MAKITARETAIN THIS PORTION FOR YOUR RECORDSARIZONA3707 E. Broadway Rd., Ste. 6 Phoenix, AZ 85040 (602) 437-2850CALIFOR
2SPECIFICATIONS• Manufacturer reserves the right to change specifications without notice.• Specifications may differ from country to country.GENERAL S
WARNINGSome dust created by power sanding, sawing, grinding, drilling, and otherconstruction activities contains chemicals known to the State of Calif
3Electrical Safety4.A battery operated tool with integral bat-teries or a separate battery pack must berecharged only with the specified chargerfor th
4SERVICE21.Tool service must be performed only byqualified repair personnel. Service or main-tenance performed by unqualified personnelmay result in a
5the cut, the teeth at the back edge of thewheel can dig into the top surface of thewood causing the wheel to climb out of thekerf and jump back towar
6SAVE THESE INSTRUCTIONSWARNING:MISUSE or failure to follow the safety rules stated in thisinstruction manual may cause serious personal injury.IMPORT
7rect reassembly may result in a risk ofelectric shock or fire.12.To reduce risk of electric shock, unplugcharger from outlet before attempting anymai
8FUNCTIONAL DESCRIPTIONCAUTION:• Always be sure that the tool is switched off and thebattery cartridge is removed before adjusting orchecking function
9• If you try to charge a battery cartridge from a justoperated tool, sometimes the charging light will notcome on. If this occurs, let the cartridge
More documents for Power tools Makita 4190D


Related products and manuals for Power tools Makita 4190D
 (8 pages)
(15 pages)
(8 pages)
(15 pages)

 (24 pages)
(20 pages)
(24 pages)
(36 pages)
(16 pages)
(16 pages)
(13 pages)
(12 pages)
(12 pages)
(11 pages)
(8 pages)
(12 pages)
(16 pages)
(24 pages)
(20 pages)
(24 pages)
(36 pages)
(16 pages)
(16 pages)
(13 pages)
(12 pages)
(12 pages)
(11 pages)
(8 pages)
(12 pages)
(16 pages)


 (48 pages)
(16 pages)
(12 pages)
(48 pages)
(16 pages)
(12 pages)
© 2020, manymanuals.com. All rights reserved. | 0.300 s |
 Manymanuals.com
 Manymanuals.de
 Manymanuals.fr
 Manymanuals.it
 Manymanuals.pl
 Manymanuals.cz
 Manymanuals.es
 Manymanuals-pt.com
Comments to this Manuals