Makita 9820-2 Instruction Manual
Browse online or download Instruction Manual for Power planers Makita 9820-2. Makita 9820-2 Instruction manual User Manual
- Page / 16
- Table of contents
- BOOKMARKS
- Sharpener 1
- GENERAL SAFETY PRECAUTIONS 2
- METHODS 4
- ADDITIONAL SAFETY RULES 5
- SAVE THESE INSTRUCTIONS 5
- 1/3") 6
- Sharpening platform 7
- (1/32") 8
- Installing coolant 9
- Draining 10
- Sharpening blade/knife 11
- CAUTION 12
- ACCESSOR 13
- (7-7/8") 14
- SHARPENER 14
- ,": 15
- Ma ki ta Corporation 16
Summary of Contents
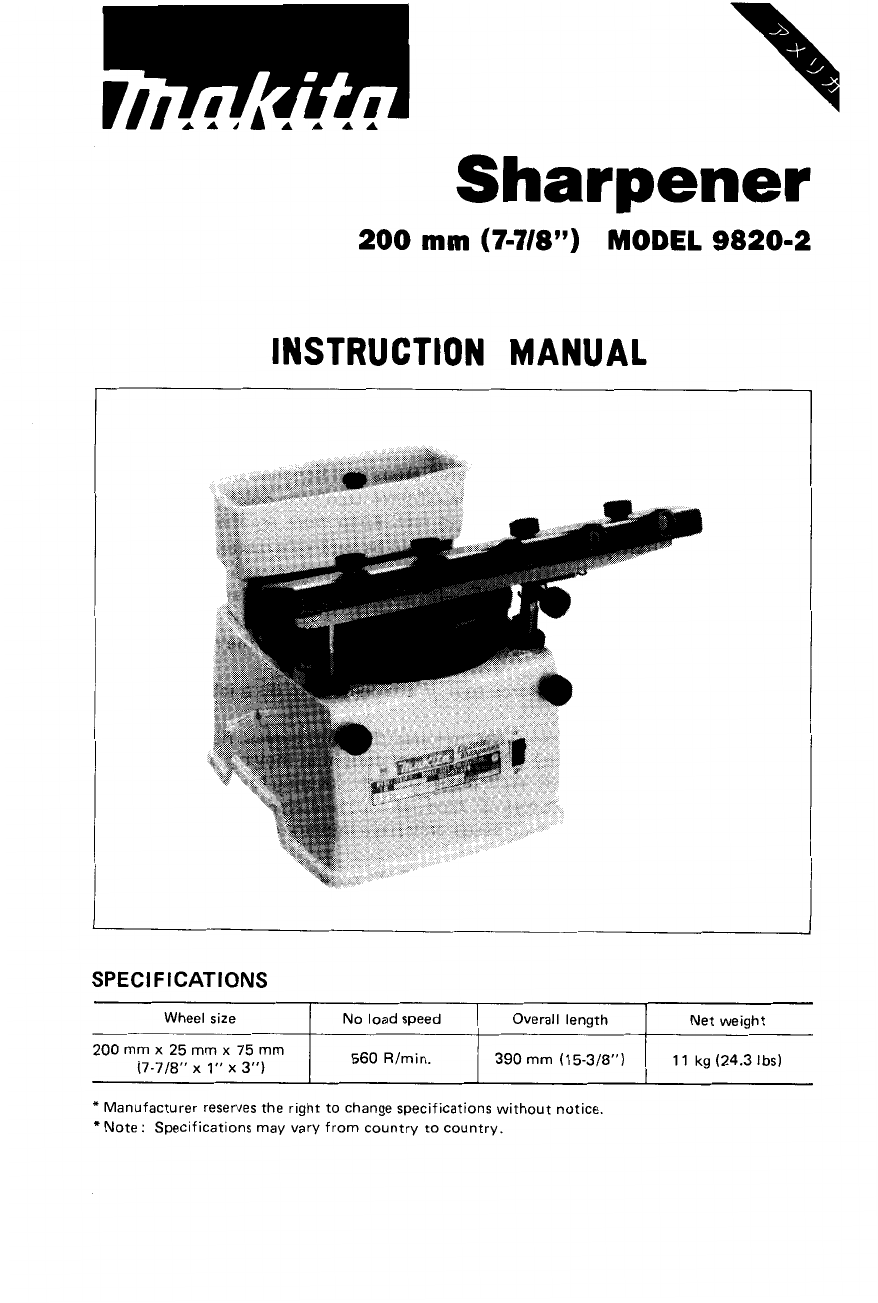
Sharpener Wheel size 200 mm x 25 mm x 75 mm (7-7/8" x 1" x 3") 200 mm (7-718") MODEL 9820-2 No load speed Overall length Net we
Adjusting coolant flow Put water in the coolant reservoir. Turn the knob so that the marking is posi- tioned vertically to make the coolant flow. Tu
Switch action To start the tool, press the ON side of the switch located on the front of the tool. To turn the tool off, press the OFF side of the s
Sharpening power planer blades Sharpen your planer blades to a 40" angle. Power planer blade CAUTION : *Clean and dry the tool after operation. 0
MAINTENANCE CAUTION : Always be sure that the tool is switched off and unplugged before attempting to perform inspection and maintenance. To mainta
Aug.-02-84 US 200 mm (7-7/8") SHARPENER Model 9820-2 Note: The switch and other part configurations may differ from country to country. 14
MODEL 9820.2 SD DESCRIPTION Sep-19-'84 US ,":, DESCRIPTION MACHINE 1 2 3 4 5 6 7 8 9 10 11 12 13 14 15 16 17 18 19 20 22 23 24 25 26 27 28 2
MAKITA LIMITED ONE YEAR WARRANTY Warranty Policy Every Makita tool is thoroughly inspected and tested before leaving the factory. It is warranted to
BEFORE CONNECTING YOUR TOOL TO A POWER SOURCE Be sure you have read all GENERAL POWER TOOL SAFETY RULES GENERAL SAFETY PRECAUTIONS (For All Tools)
17. USE RECOMMENDED ACCESSORIES. Consult the owner's manual for recommended accessories. The use of improper accessories may cause risk of
GROUNDING INSTRUCTIONS ALL GROUNDED, CORD-CONNECTED TOOLS: In the event of a malfunction or breakdown, grounding provides a path of least resistance f
ADDITIONAL SAFETY RULES 1. Use only wheels having a maximum operating speed at least as high as "No 2. Check the wheel carefully for cracks or d
HOW TO USE Replacing grinding wheel Use the wrench provided to release the grinding wheel by turning the installation screw counterclockwise.
Loosen the pole fastening screws and lift off the sharpening platform guide. To install the sharpening platform guide, follow the removal procedu
The nut for raising or lowering the pole on either side raises the pole 0.5 mm (1/32") for each graduation, when turned clock- wise, and
Screw in clockwise the forward adjust screw on the right until the right upper edge of the blade comes into contact with the grinding w
More documents for Power planers Makita 9820-2

Related products and manuals for Power planers Makita 9820-2
 (20 pages)


 (56 pages)
(16 pages)
(56 pages)
(16 pages)
 (32 pages) (16 pages)
(16 pages)
(56 pages)
(12 pages)
(32 pages) (16 pages)
(16 pages)
(56 pages)
(12 pages)
 (6 pages)
(1 pages)
(6 pages)
(1 pages)
© 2020, manymanuals.com. All rights reserved. | 0.696 s |
 Manymanuals.com
 Manymanuals.de
 Manymanuals.fr
 Manymanuals.it
 Manymanuals.pl
 Manymanuals.cz
 Manymanuals.es
 Manymanuals-pt.com
Comments to this Manuals